Sliced thin, lightly breaded and fried in olive oil, then dipped in red sauce and assembled like a lasagna!
12/31/10

12/3/10
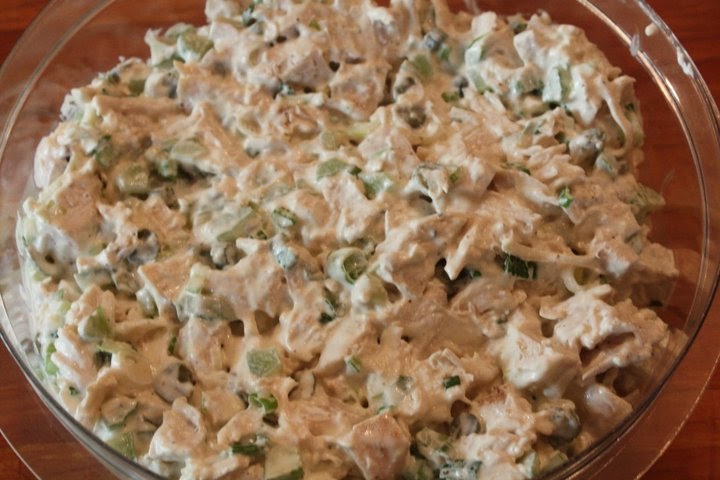
Famous Chicken Salad

This is a really simple recipe for chicken salad that everyone seems to love, especially my wife and her friends. The first time I made it for friends was before going on a canoe trip. I packed it in some Tupperware, put some pita halves in a Ziploc bag and brought it along. After a few hours of rowing and drifting I simply filled the pita with some chicken salad and passed one to my wife. A couple of her friends wanted to try a bite and the next thing you know it was passed around and never made it back! No worries, I had plenty more and before long it was all gone, they gobbled it up and I knew I had a winner!


Chop the chicken or shred with your hands into bite size pieces. I like to keep the chicken pieces rather large about a half inch or so, it will break down a little after you mix it so I want it to have a little texture and bite!

Put the chicken pieces in a large mixing bowl and add equal parts mayonnaise (I prefer Hellman's, some people like Miracle Whip) and sour cream and a squirt of Dijon mustard. Start with a smaller amount of the mayo and sour cream you can always add more if it is too dry.


.
11/15/10
Tomato, Arthichoke, Black Olive and Fresh Mozzarella Bruschetta!!

This is a really simple, fast and delicious appetizer to serve your family and friends. I recently made this for my wife and her friends as an appetizer before they went to the movies, they all loved it. There are only a few ingredients so it is important to use the best you can find. You will need some vine ripened tomatoes, marinated artichokes, black olives (or green if you prefer), fresh mozzarella, fresh parsley, garlic, good quality balsamic vinegar and extra virgin olive oil, salt and pepper, and a baguette!


Start by doing all your prep work. Chop the tomatoes (about 3/4 of a pound of the ripest you can get, to me the smaller tomatoes work best), marinated artichoke hearts (I used about 1 small jar and a half), black olives (about 1/2 a can), fresh mozzarella (I used about 3/4 of the container) all into about the same size pieces. I think it is important to take the time and cut everything the same size.


This is one of those recipes that when it comes to how much of each ingredient to add there really is no right or wrong, put in as much of each as you like. If you love artichokes, add more, if your not a huge fan of black olives, put in a little or none at all, it can be totally customized to your taste. For the fresh mozzarella, you can buy any type you want, but the smaller balls are easier because they require less chopping (I simply quartered the ones you see in the picture above). Put all the ingredients into a large mixing bowl, now add some chopped parsley and chopped fresh garlic (I used 4 cloves chopped very small).


11/8/10
Shells and Broccoli with Shrimp!!


You will need 1 lb. of large pasta shells (not the size that you stuff and bake), 8-10 cloves of garlic chopped, some fresh broccoli, fresh wild caught shrimp, olive oil, butter, red chili flakes, fresh chopped parsley and fresh parmigiana reggiano cheese, and a few lemon wedges.
Start by doing all your prep work. Peel and devein the shrimp if they have not already been cleaned (the amount of shrimp to use if any is totally up to your taste and budget), cut the broccoli into bite sized florets (as far as how much broccoli, again it is up to you depending on how much you like a lot or a little), chop the garlic and the parsley. That's pretty much all the prep work!

Bring a large pot of salted water to boil, one you normally use for pasta. Drop the broccoli florets into the boiling water. While the broccoli is cooking make an ice bath in a large bowl big enough to hold the broccoli by simply adding ice cubes and water. After about 4-5 minutes of cooking the broccoli remove it from the water with a slotted spoon and place it in the ice bath, this will stop the cooking process so the broccoli will remain crisp and keep the bright green color that we love.

10/14/10
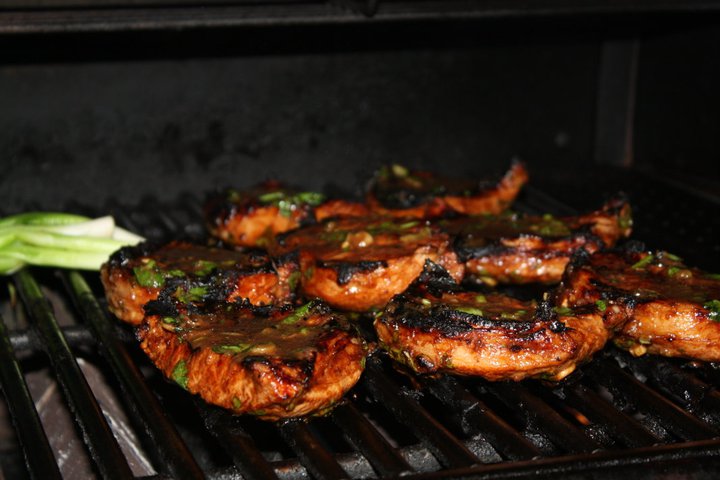
Asian Spiced Pork Chops w/ Pan Fried Udon Noodles!!

We love Asian food in our house, whether it is simple Chinese take out like fried rice or beef with broccoli, or going out to a nice Japanese steakhouse for hibachi steak or chicken and all that comes with it. After a recent visit to a new Japanese steakhouse in our neighborhood, we were introduced to grilled Udon noodles. They were brought precooked on a tray and slapped on the grill in front of us, seasoned with spices and soy sauce and heaped into bowls. Now we pretty much like any type of pasta in our house and this was no exception, everyone loved it! A few days later everyone was still talking about the noodles and wanted some more so I decided to try them myself. I watched the cook make them in front of us that night and it looked simple enough.......and it was! These noodles are a great alternative to rice and take less time to make. I pair them with beef, chicken, pork or fish which I marinade in a simple blend of Asian spices and grill or broil in the oven.

1 cup soy sauce
1 tbs. Thai chili garlic sauce (more if you like spicy like me)
Juice of 1 lime
1/4 cup of orange juice
1/4 cup sesame oil
1/4 cup olive oil
11/2 tsp. fresh grated ginger
4-6 garlic cloves chopped
1 tbs. honey
2 tbs. rice wine vinegar
3 scallions chopped
2 tbs. chopped cilantro
As I've stated previously, when I cook I do not measure out the ingredients and these are just approximations. This marinade is very versatile and flexible and can be tailored to your particular tastes, if you like spicy add more chili sauce, if you don't like ginger or scallions leave them out, etc. For this recipe we had some pork chops in the fridge so that is what I used, it could just have easily been done with chicken, steak or even fish.


After the meat is finished marinating bring it to the grill. Obviously you can also cook in the oven or under the broiler if you prefer. Place the chops on the grill and spoon some of the marinade on top, cook the chops for a few minutes turning a quarter turn halfway through to get nice grill marks. Turn the chops over and cook the same way with a little marinade on top turning a quarter turn halfway through on the other side. The total cooking time for these chops was about 6-8 minutes per side. When they are cooked through remove them to a plate to rest, be careful not to over cook the pork they will dry out.

10/12/10
Pot Roast Soup

This recipe is based on a soup my dad used to make. Yes, dad did a lot of cooking too, in fact he used to cook all the weekday meals since both my parents worked and he was the first one home. I don't think dad really enjoyed cooking that much, it was just something he had to do, even though he was pretty good and very often was quite creative (you never knew what you were gonna get that night). One thing was for sure though, dinner was at a certain time and you had better be home or else. Many a time I had to leave in the middle of a baseball, football, or basketball game to teasing chants of "I gotta go home and eat" from my friends!

When I make soups, I usually do so in 2 different pots. In the first pot, I have whatever meat will be in the soup and build a stock with it along with some veggie scraps, and spices. In the second pot, I have the vegetables that will be in the finished soup along with some spices and a container of store bought stock. Do all your prep work in advance, it makes things go much smoother and quicker, so I always start by doing all my chopping and cutting first. For this soup I like a lot of meat because it comes out so tender and delicious. I usually buy 1 large pot roast or 2 smaller ones. I prefer to buy the bone in pot roast because it adds flavor to the soup. For this particular batch of soup I made they had no bone in pot roast so I bought a large boneless one and added 2 beef shanks to help flavor the soup. You can even buy beef bones at the store and use them along with a boneless pot roast, entirely up to you.


Now on to the other pot. In this pot I start to build a base for the soup. As I said earlier, I like to have all my prep work done before I start to cook so you will need to cut up 5-6 carrots, 5-6 stalks of celery, 1 large onion, and 6-8 cloves of garlic. If you like a lot of vegetables in the soup, use more, if not, use less, up to you. I like to cut them up in rather large pieces since they are gonna cook up in the soup, it makes the soup a little heartier and more rustic. Start by heating some olive oil in a medium soup pot, add the chopped onions and let them saute for about 6 minutes until they begin to get translucent. Next add the garlic for a few minutes followed by the celery and carrots. At this point I will add some sea salt and pepper and allow the veggies to cook together for about 6-8 minutes more stirring so they don't brown. Next add 1 large can of whole or chopped San Marzano tomatoes. Allow this to come to a good boil stirring frequently. Now add 1 large container of beef broth and 2 bay leafs, bring to a boil again and reduce to a simmer. Taste for salt and pepper adding if needed.


Allow both pots to cook low and slow. After the pot roast has cooked long enough for the meat to be tender (about 1 1/2 hours), remove the meat to a plate and check it for tenderness. It should fall apart rather easily when pulled with a couple of forks, if it does not return it to the pot to cook a little longer. If it is tender then allow it to cool enough that you can handle it and break it into the desired size pieces. I like to leave it in large bite size pieces.


Subscribe to:
Posts (Atom)